This past weekend, Will and I chose to escape to Mt. Adams. The biggest question was deciding which hike to choose during our short escape and we ultimately decided on the Sleeping Beauty Mountain Hike.
Sleeping Beauty Mountain came highly recommended and we decided to commit! And holy cow, let me tell you – this hike is easily the most underrated hike in Washington.
Elevation is the name of the game here folks – but the view from the top is well worth the effort, believe me.
Sleeping Beauty Mountain Hike
- Distance: 3 miles out and back
- Elevation gain: 1,400′
- Estimated hiking time: 1 hour
- Type of hike: difficult
What’s in a name?
Sleeping Beauty Mountain got its name because to the rock outcrop looks like a sleeping woman (chest to the sky) from the town of Trout Lake.
Hiking Tips for Sleeping Beauty Trail
Practice Leave No Trace
- If you’re unfamiliar with Leave No Trace, it’s a measure to be a good steward of the land. You can read about the seven principals of Leave No Trace here.
You + Sunscreen = Best Friends (Forever)
- I swear by this sunscreen, I discovered it in France and now buy it in bulk. You’ll never catch me without it!
Wear hiking boots with good traction
- Even though the trails are well maintained, exposed roots are common. It’s easy to trip in the woods, so set yourself up for success by wearing proper shoes.
- These are my hiking boots, and I’d sleep in them if I could.
Hiking with pups
- Dogs are allowed on trails, but must be kept on leash.
Sleeping Beauty Mountain Hike Overview
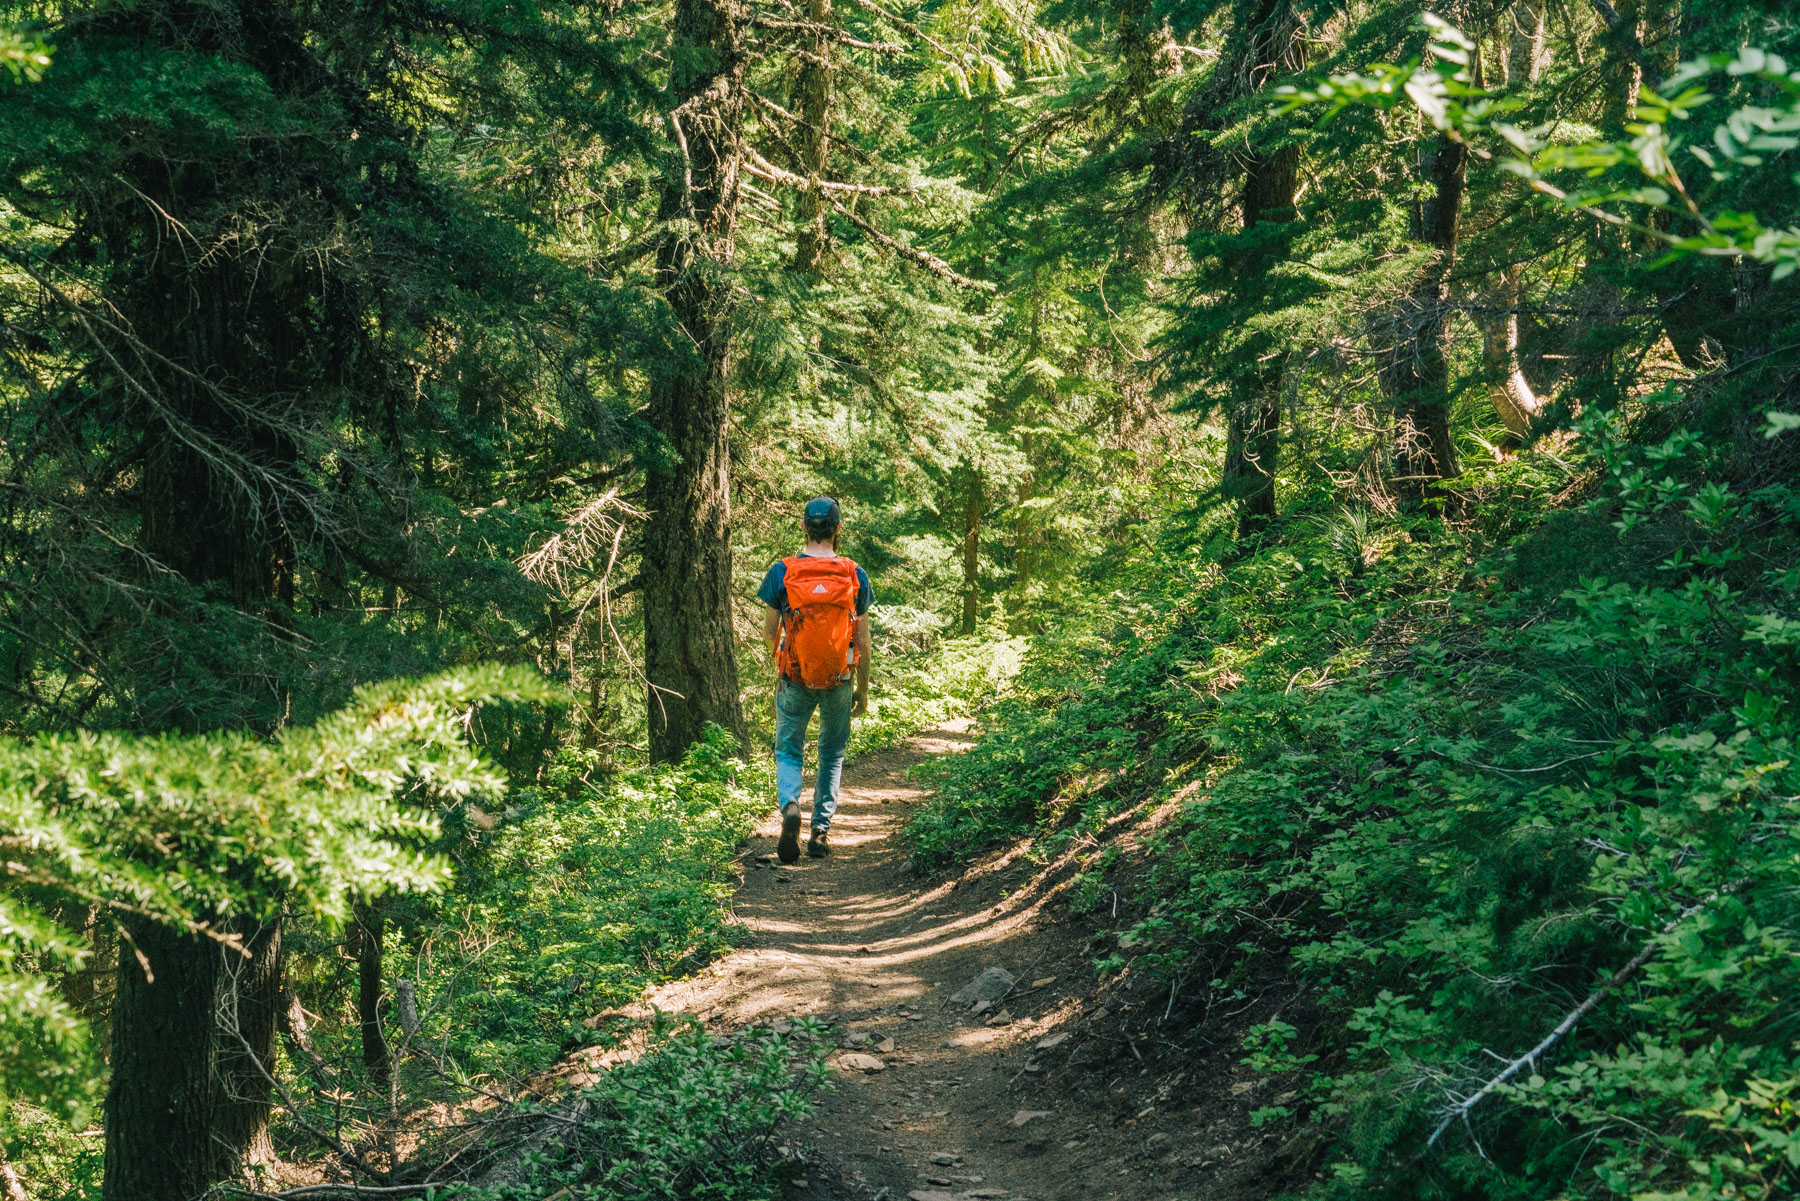
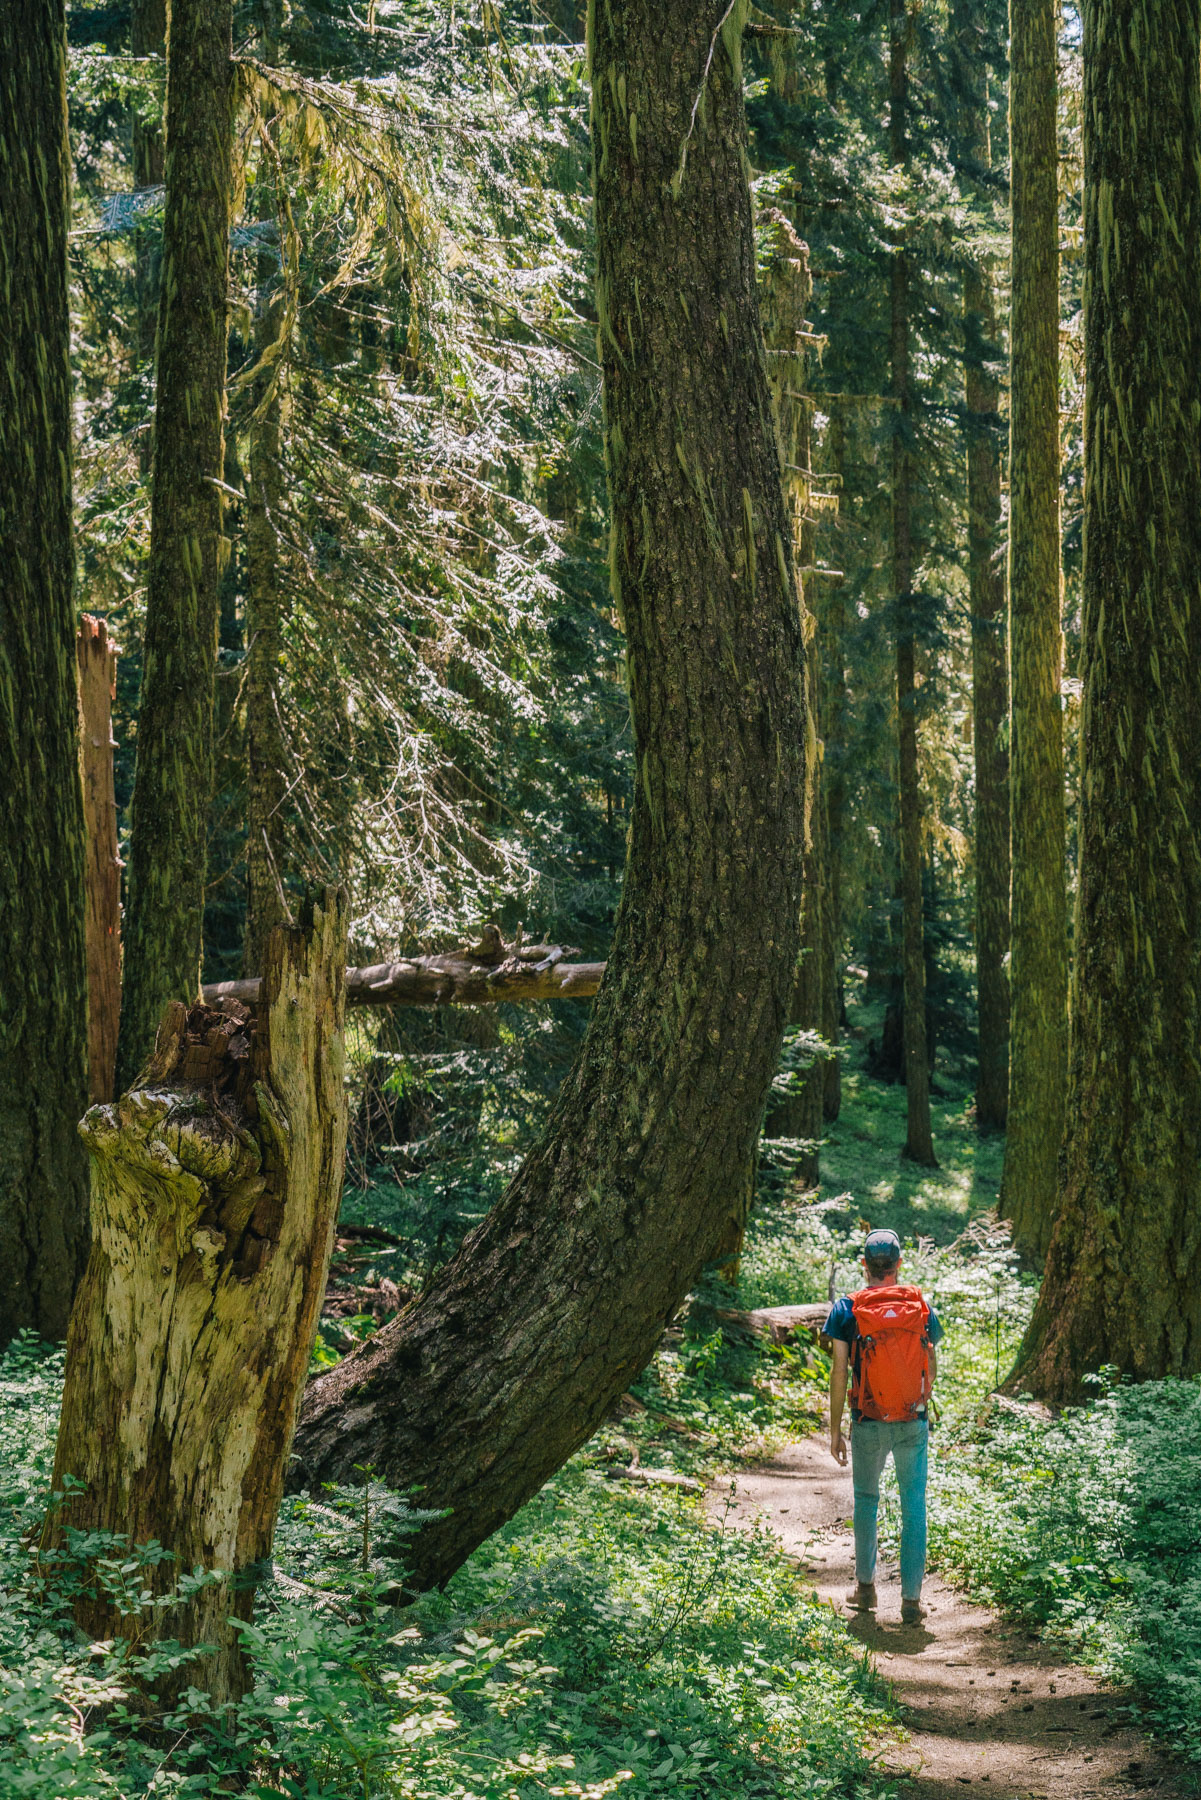
The Sleeping Beauty Mountain Trail starts off steeply from the get go. This gal won’t deceive you, elevation gain is the name of the game. The hike is uphill all the way to the ridge line of the summit.
The trail is stunning, it leads you through an impressive dense forest of towering trees. I suggest taking in the views by adopting an easy pace on your way up. What’s the rush?
We took a break 3/4 of the way to the top and I’m glad we did because those 10 minutes of calm made it easy to enjoy the scenery.
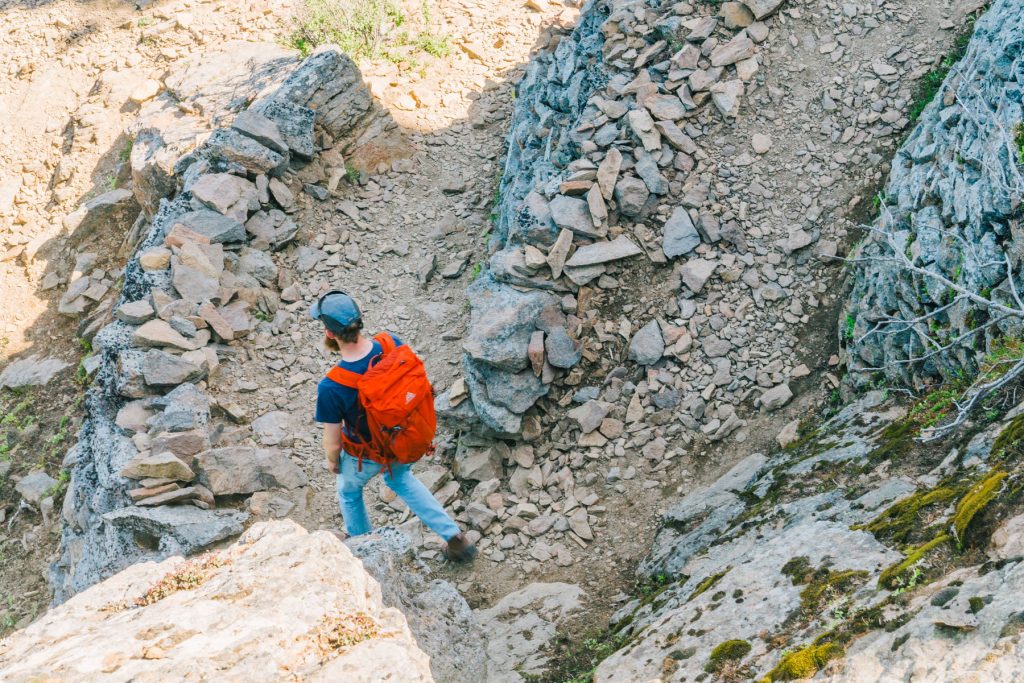
After your break, continue your way up until you’ll notice the forest starts to thin. This is a good sign because it means you’re nearing the summit.
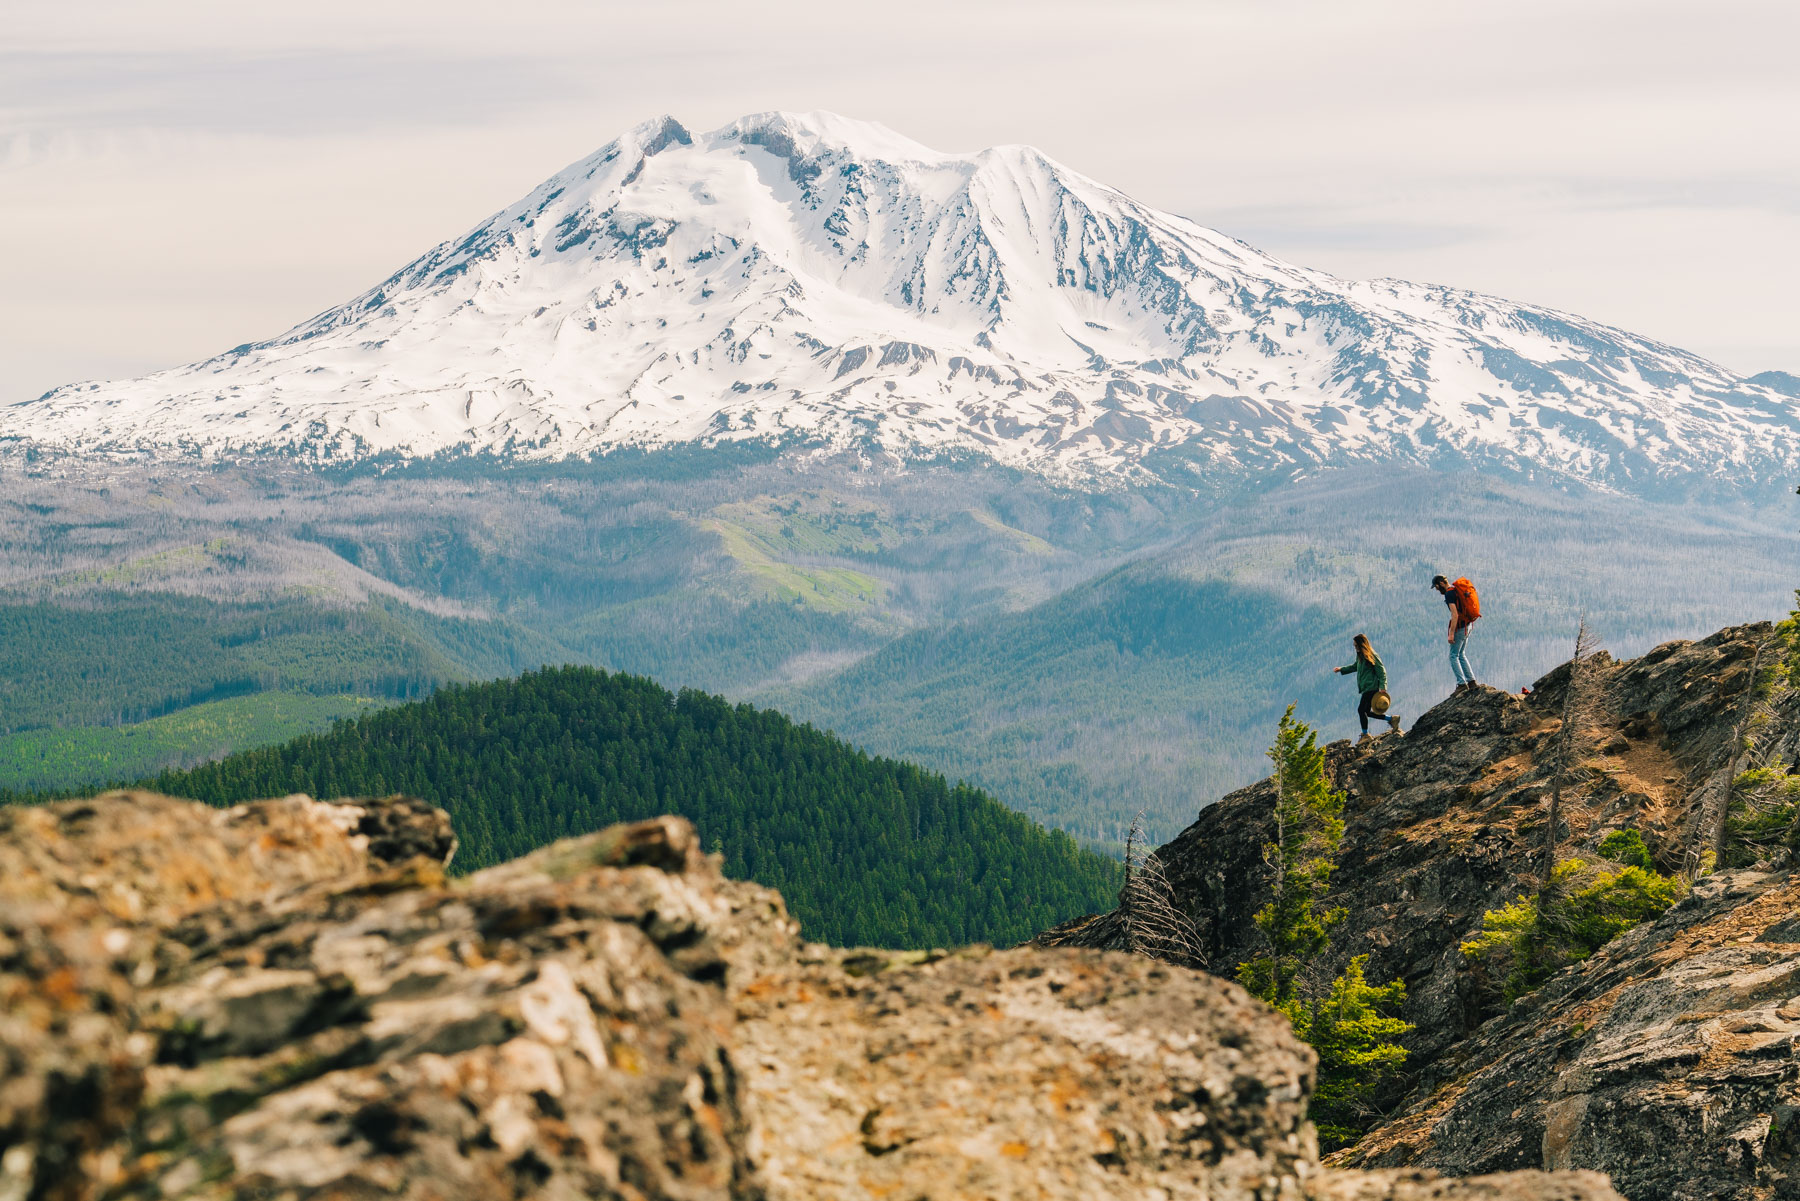
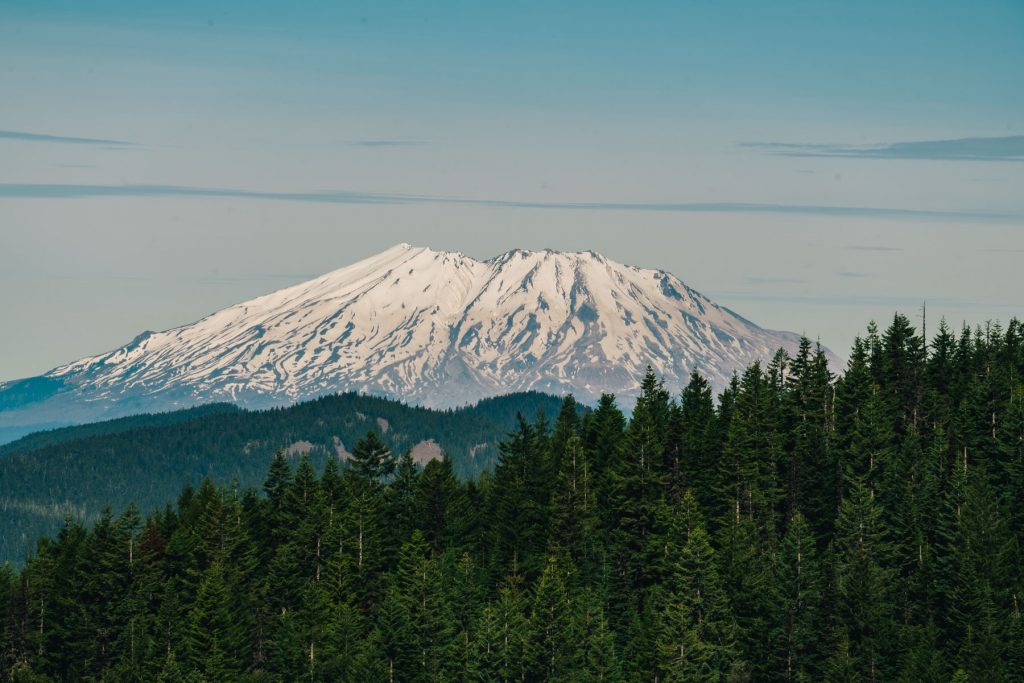
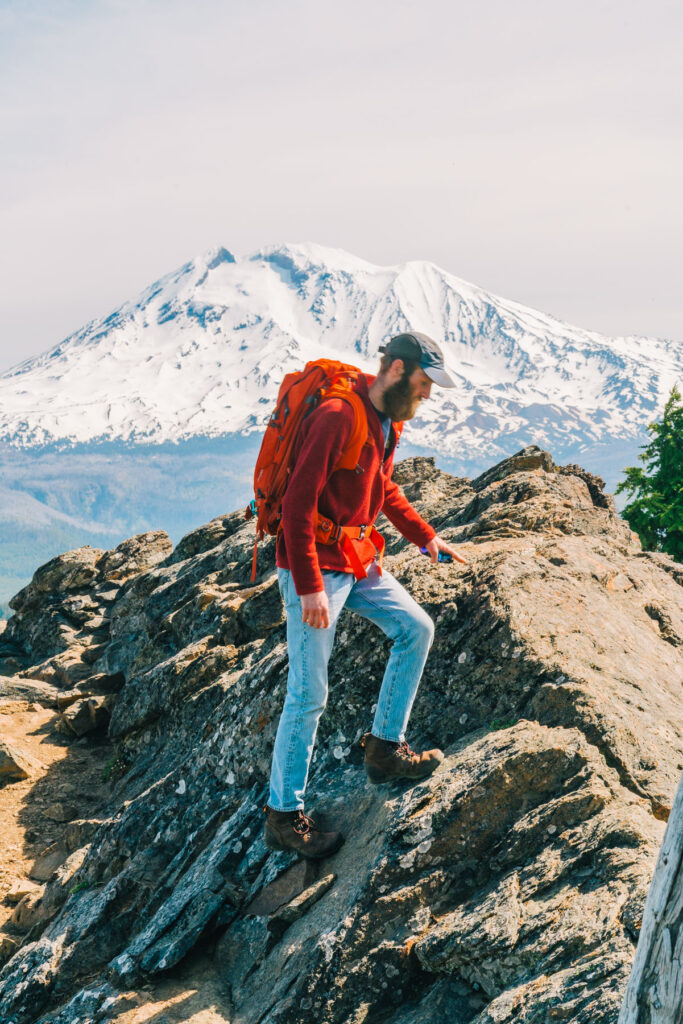
As the terrain becomes less soil and more rock, you’ve made it the ridge line! Allow your heart rate to slow down while you absorb the unbelievable view of Mt. Adams. And trust me – it’s even better at the top!
Once you’ve had your fill, continue up the steep rocky switch back to reach the summit of Sleeping Beauty.
I know it’s hard to believe that Mt. Adams could look better than it did from the ridge line but lo’ and behold – here she is in all her unadulterated glory!
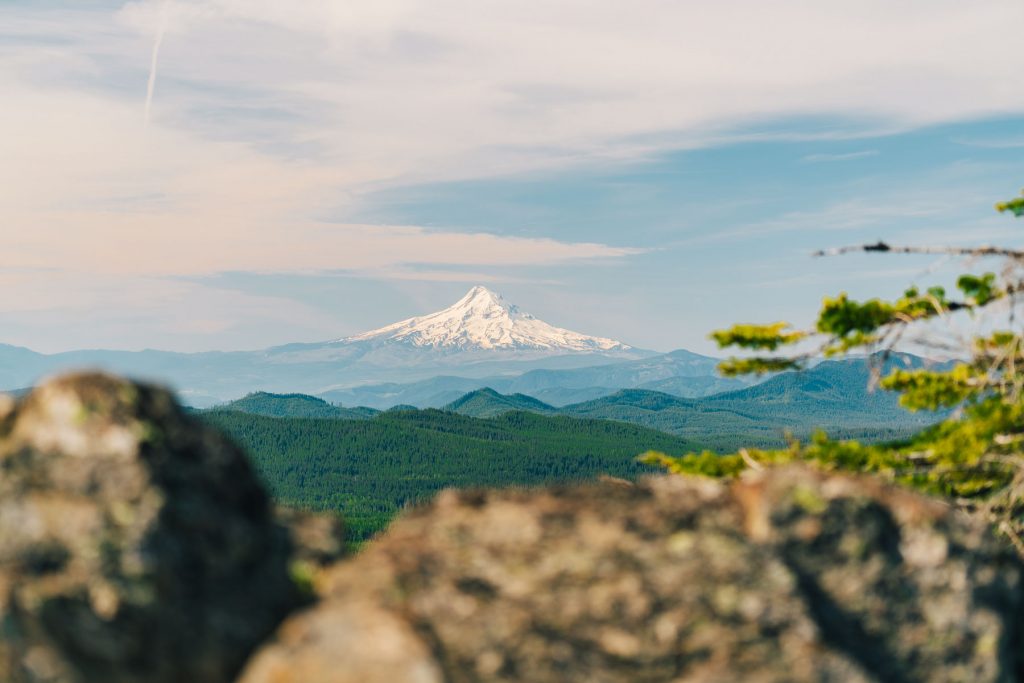
What’s more, all the Cascade mountains will be vying for your attention. Look around and you will see Mt. Hood, Mt. St. Helens and Mt. Rainier.
Have a snack, or ten, and soak in the view – you earned it! The hike isn’t easy, but the reward at the top is a no brainer.

After you get your fill of the summit, feel free to head down. The way down is way easier than the way up, so take your time and enjoy the view!
We hope you enjoy hiking the Sleeping Beauty trail at Mt. Adams.
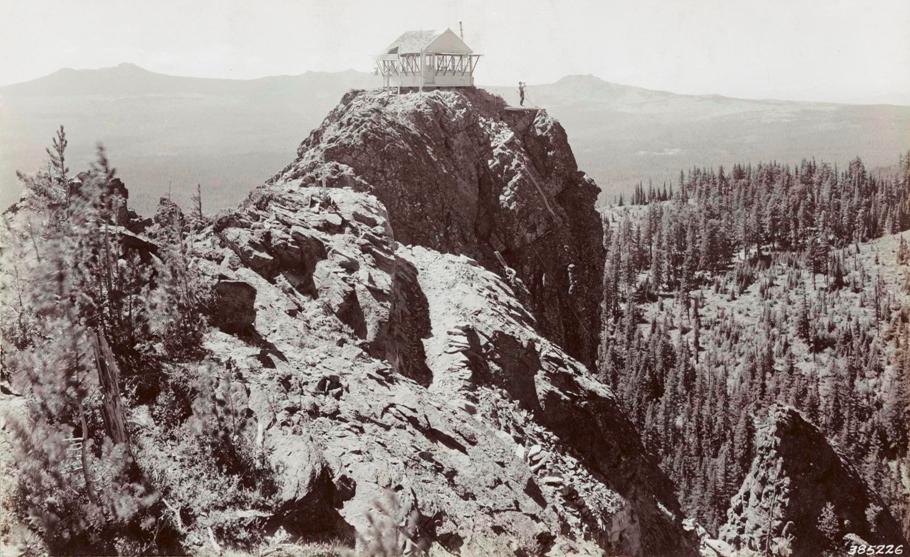
Sleeping Beauty Mountain Fire Lookout
You may notice concrete blocks at the summit of Sleeping Beauty. This used to be the Sleeping Beauty Fire Lookout which has since been removed. Don’t believe me? You’re smarter than you look.
Like hiking?
Us too. The party doesn’t have to stop here – check out the posts below.
- 10 Best Hikes at Mt. Rainier National Park
- 8 Best Hikes in Redwood National Park
- Sequoia National Park in Winter (with video)
- 14 Things to do in Virgin Islands National Park
- 16 Things to do in Death Valley National Park
Sleeping Beauty Mountain Hike, Sleeping Beauty Mountain Hike, Sleeping Beauty Mountain Hike, Sleeping Beauty Mountain Hike,
Until next time,
Antonina


I’m happy to have this trail just down the road from me!
Beautiful photography. What camera system do you guys use?